Successfully Integrating Phaser 3 into your React/Redux App (Part 3)
A tutorial on building a Phaser game within your React/Redux app.
This is part three of a three part tutorial. To start from the beginning, checkout my first post here. Or skip to part two here.
In part two, we will focus on creating adding movement, animation, sound, and an opening scene. We will also connect our game to the redux store. By the end of this section, your Phaser game will be fully functional within your React/Redux app!
Step Eight: Movement, Animation, and Sound
Movement, sounds, and animation are streamlined through the use entities.
Player Animation
First, let’s create our character animations. In MainScene.js, write a helper method on the MainScene class that creates all of our player animations.

Then, call that helper method after our player has been created in the create method.

Now your animations are all set up. It is also a valid strategy to create your animations within the create method. I like to use a helper function because it keeps my create method from getting too big. We will assign the animations to the Player entity when we define their movement.
Player Movement
First, we need to tell our game to listen for the user’s cursor inputs. In MainScene.js, under the player definition, add one line to listen for cursors.

In Player.js, we are going to add two helper methods on the Player class. One will manage player movement and animation while running, and the other will handle player movement and animation while jumping.
First, let’s make our player run. Add a helper method under the constructor that listens for the left and right arrow keys and sets the player’s velocity accordingly. Also, notice I have assigned the animations we created using the play method.

Next, let’s make our player jump. Add a helper method under the your movement helper method that listens for the up, left, and right arrow keys and sets the player’s velocity accordingly. Also, notice I have assigned the animations we created using the play method.
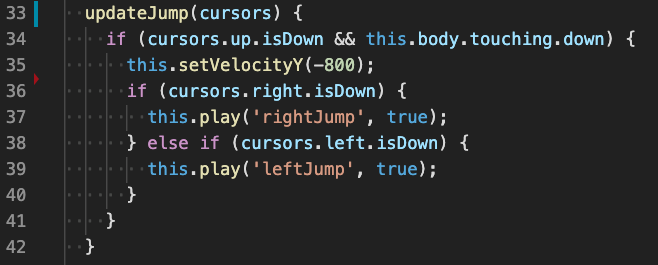
Now we have defined two movement helper methods. We must invoke these methods in the Player update method to ensure that the movement is continuously updated. Add an update method to the bottom of your Player class.
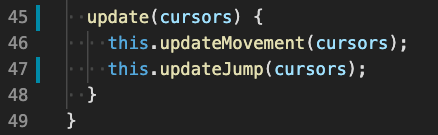
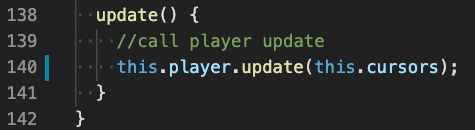
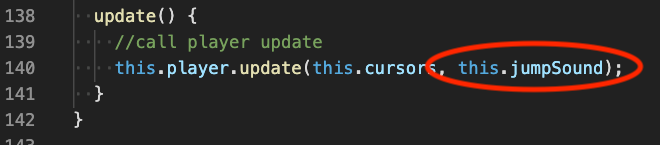
Finally, we’re going to hop back over to MainScene.js to make sure our Player entity is updated in the main scene. At the bottom of the MainScene class, add an update method and call the player’s update method within it, passing the cursors that we defined in the create method of MainScene.
If you launch your game now, you should be able to make Newt run and jump using the arrow keys!
Player Sound
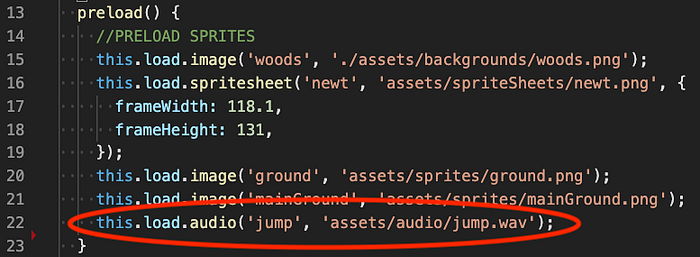
Since we’ve already defined our player’s movement, we only need to add a few lines of code to add sound. Let’s add sound to Newt’s jump. First, we have to load the sound file in the preload method on our MainScene class in MainScene.js.
Then, head down to the create method and define the sounds using the spriteKey. You can also edit the volume of individual sounds.

Finally, go to the update method of MainScene in which we invoke this.player.update. Add this.jumpSound as a second argument so we can play it within the Player entity.
Now that the jumpSound has been created, let’s use it in our Player entity.
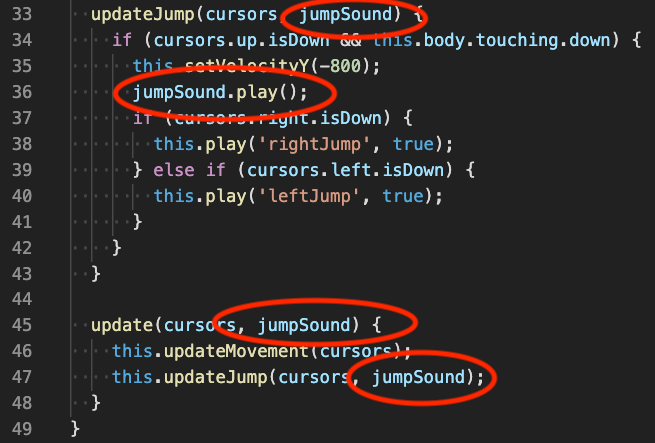
In Player.js, add jumpSound as a second parameter in the Player update method, so it is prepared to receive the second argument we just passed to it in MainScene. Then, add jumpSound as a second argument to the invocation of the updateJump method, and as a second parameter to the definition of the updateJump method. Now that it has been passed from MainScene.update, to Player.update, to Player.updateJump, invoke the built-in play method of the sound to link it to the player’s jump.
If you launch your game now, you should hear a cute little noise when your player jumps.
Firefly Overlap and Sound
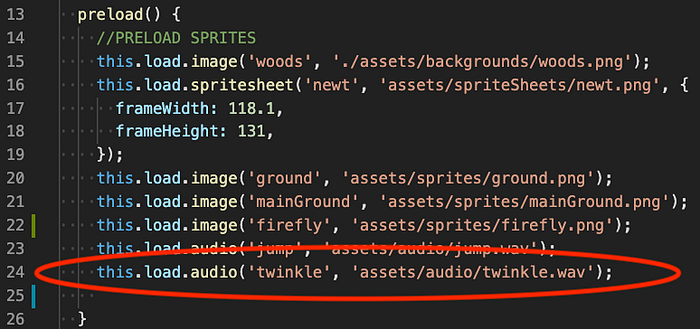
Newt needs something to DO while she runs around the forrest. Let’s make the fireflies collectable using overlap. First, load a firefly sound in your preload method on MainScene.
Then in the create method of MainScene, declare the sound using the spriteKey.

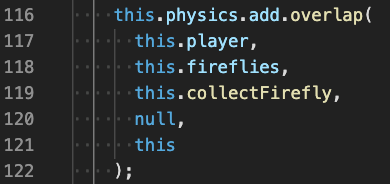
Now let’s add the overlap. Toward the bottom of the create method of your MainScene, add an overlap between the player and the fireflies group that calls a helper method, collectFirefly, that we will define momentarily. Be sure to add this overlap AFTER you have defined your player and fireflies.
Between the create and update methods of MainScene, add a helper method called collectFirefly.
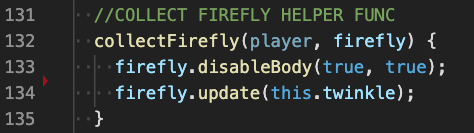
The disableBody method will make the firefly disappear once Newt overlaps with it. Then, we pass the twinkle sound to the Firefly entity’s update method. But wait, we haven’t written that update method yet! Before we write it, remember to bind the this context of your helper method in the constructor of MainScene.

Then head over to entities/Firefly.js. Add a playedSound property to the constructor. Set it to false.
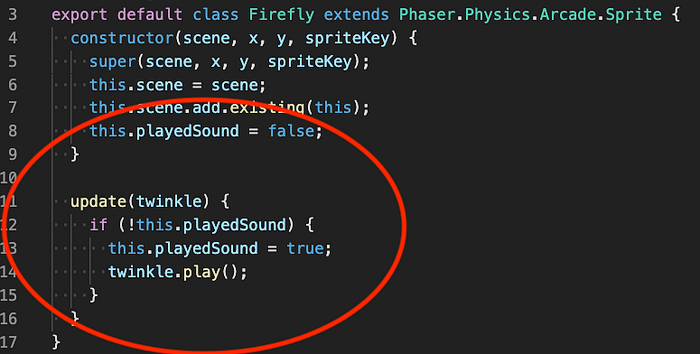
Then, write an update method with an if block that only fires if the playedSound property is false. The first time this sound plays, we will set it to true, to prevent any glitches. The first time a Newt overlaps with an instance of firefly, the twinkle sound will play.
If you launch your game now, Newt should be able to collect fireflies! Now let’s reward the user every time she does.
Step Nine: Connecting the Redux Store
In part one of this tutorial, we set up 2 React components, a leaderboard and a submit score form. They are fully functional components that allow you to fetch scores from the database and allow you to submit your score. However, the score property on the state has not yet been connected to our Phaser game, so it is perpetually at zero. Let’s fix that!
Every time Newt catches a firefly, let’s give the user 10 points. Head over to MainScene.js. To keep track of the score, add a score property to MainScene in its constructor.

Then, find your collectFireflies helper method and add these two lines.
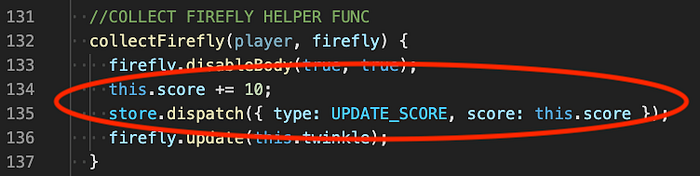
The first line increments the score by 10 every time Newt overlaps with a firefly. The second dispatches an action type to our Redux store to update the score. Your Redux score now responds to your Phaser game. It’s that easy!
If you launch your game now, the React component that contains the store’s score property will now update in real time as Newt collects fireflies!
Step Ten: Opening Scene
You already have a fully functioning Phaser game that is connected to your React/Redux app. If you’d like, you can add an opening scene to welcome your user, so they are not thrown right into the action. Similar to entities, scenes are modular class components. So, we are going to define our new scene in scenes/OpeningScene.js. Import Phaser.

Similar to MainScene, define a class OpeningScene that extends Phaser.Scene. Within the constructor, pass the sceneKey ‘OpeningScene’ to the super.

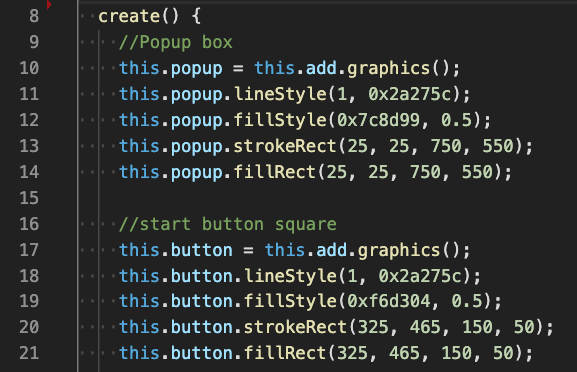
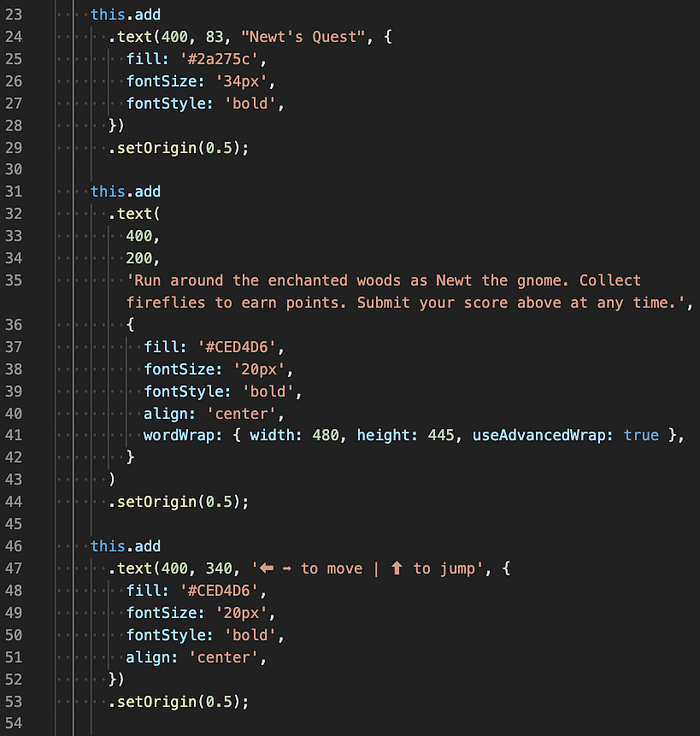
Then, add a create method. The first thing we want to add is a pop up box and a start button.
Then, add a title, description, and instructions.
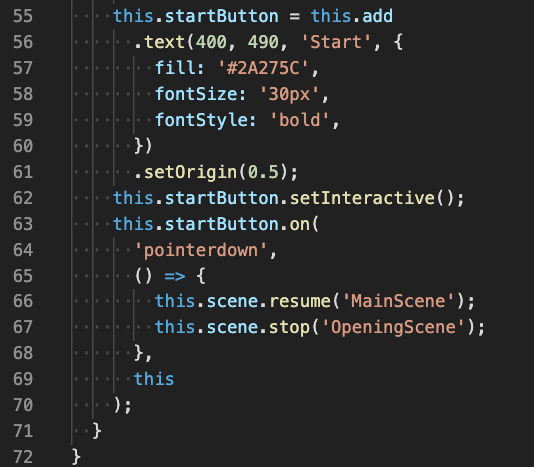
Finally, add text to your start button and make it interactive. When the user clicks the start button, resume MainScene and stop OpeningScene.
But wait! Our game doesn’t know about OpeningScene. Export the OpeningScene class then head back over to game/index.js and import OpeningScene. Once you’ve done that, add it to the scenes property of the constructor. Make sure to add it after MainScene.

The game will start with the first scene in the scenes array. The OpeningScene is a semi transparent popup window, so we want it to appear on top of the graphics of the main scene. Thus, we want to create MainScene, but launch OpeningScene before the user can play. So, to launch our OpeningScene, head back over to MainScene.js, and add these two lines at the very bottom of the create method.

And that’s it! You now have a fully functional, multi-scene Phaser game within your React/Redux app! Congratulations. I hope you enjoyed the tutorial.